This SAGA GIS free download guide takes you from zero to your first terrain analysis in one sitting. SAGA GIS (System for Automated Geoscientific Analyses) is the free, open-source GIS built for geoscientific work — and it is famous for one thing: terrain analysis from digital elevation models. Students use it to compute slope, aspect, hillshade, and watersheds, model floods and erosion, and run over 450 free geoprocessing modules — with zero license fees. This guide walks you through downloading SAGA GIS, running it on Windows or Linux, loading a free elevation DEM, and generating your first slope and hillshade maps.
You need only a free elevation file (SRTM or Copernicus DSM) and a few minutes. Every step is short and plain. Let’s begin.
SAGA GIS Free Download and First Terrain Analysis
What Is SAGA GIS?
SAGA GIS is a free, open-source GIS written in C++. It started at the University of Göttingen and is now a community project with over 450 modules for geodata processing.
Its specialty is terrain analysis: morphometry (slope, aspect, curvature), hydrology (flow accumulation, catchments, channel networks), illumination (hillshade, visibility), and classification of landforms from DEMs. It also handles geostatistics (Kriging, variograms), image analysis, vector tools, and grid interpolation.
Students pick SAGA for three reasons. First, it is completely free — GPL open source, no paid tier. Second, its terrain modules are deeper than QGIS’s built-ins for slope, wetness index, and watershed work. Third, it is portable: on Windows it runs from a folder with no installation, and everything is scriptable via the command line, Python, and R.
The current stable release is SAGA 9.7.0, which added tools to build DEMs directly from LiDAR files (LAS/LAZ) and to auto-download CGIAR SRTM and Copernicus DSM elevation data. This guide uses that release.
System Requirements
| Component | Minimum | Recommended |
|---|---|---|
| OS | Windows 10/11 (64-bit), Ubuntu 20.04+ | Any current 64-bit Windows or Linux |
| RAM | 2 GB | 8 GB+ for large LiDAR and DEM datasets |
| Disk | 300 MB for the program | 2 GB+ free for DEMs and outputs |
| CPU | Any dual-core | Quad-core for faster module runs |
SAGA needs no Java, no admin rights, and no license. It runs even from a USB stick on Windows.
Step 1: Download SAGA GIS from the Official Source
Go to sourceforge.net/projects/saga-gis and open the Files section. This is the official download home. Avoid random mirror sites.
On Windows, download the saga-x64 zip for the current release. There is no installer — you simply unzip the folder and run it. On Linux, install from your distribution’s package (most repos ship SAGA) or grab the build for your distro from the same Files page.
Always take the latest stable release, not nightly or test builds, for class and project work.
Step 2: Run SAGA GIS (No Install Needed)
Windows: unzip the downloaded folder anywhere, open it, and double-click saga_gui.exe. That is the whole installation. It even runs from a USB drive.
Linux: start it from your app menu or run saga_gui in a terminal. The interface shows a module tree on the left, a workspace in the middle, and the map view on the right.
On first launch you may see the startup splash and a tips panel. Close the tips — you will not need them for this tutorial.
Step 3: Get a Free DEM (Elevation File)
Terrain analysis needs a digital elevation model. SAGA 9.7.0 can download CGIAR SRTM or Copernicus DSM tiles automatically — open the Georeferencing or Import tools and look for the elevation-download tools.
Alternatively, download a 30-meter SRTM tile for your study area from an open source like OpenTopography or the USGS EarthExplorer. Any GeoTIFF DEM works. Keep it small (one tile) for your first run.
Save the file somewhere easy to find, like a folder called dem on your desktop.
Step 4: Load the DEM and Make a Hillshade
Load the raster: go to Geoprocessing > File > Grid > Import > Import Raster, pick your DEM file, and click OK. The DEM appears in the workspace and map view.
Now create a hillshade, the classic shaded-relief map: go to Geoprocessing > Terrain Analysis > Lighting > Analytical Hillshading. Select your DEM as input and click Okay. A new hillshade grid appears.
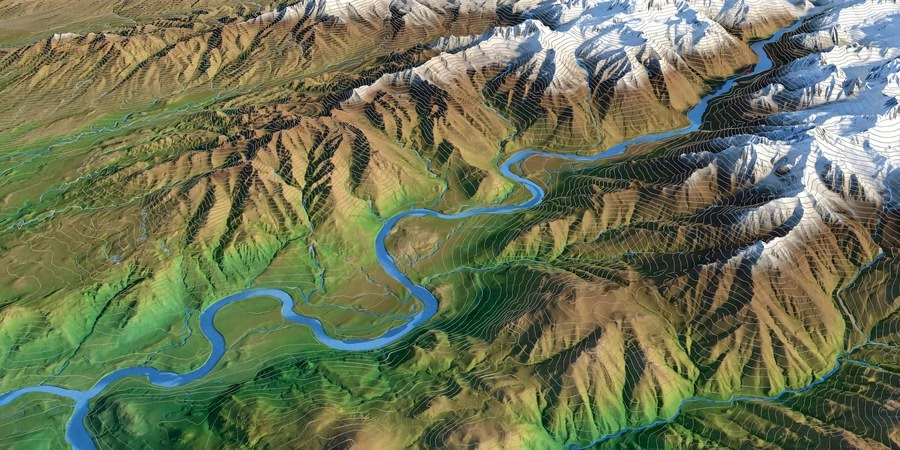
Right-click the DEM layer in the map view and set its transparency, then stack the hillshade under it for a beautiful relief map. This two-layer trick is the standard terrain visualization in geomorphology papers.
Step 5: Compute Slope and a Watershed
Slope is the workhorse of terrain analysis. Go to Geoprocessing > Terrain Analysis > Morphometry > Slope, Aspect, Curvature. Choose your DEM, run it, and you get three new grids. Slope values above 30 degrees usually mean landslide risk zones.
For hydrology, fill sinks first: Terrain Analysis > Preprocessing > Fill Sinks. Then run Catchment Area to get flow accumulation — high values trace the river channels. Follow with Channel Network to extract the stream network as a vector layer.
You now have a hillshade, a slope map, and a stream network from one free DEM. That is the core of terrain analysis — and it took minutes, not licenses.
⬇ Download SAGA GIS Free (Official Site)
SAGA GIS Free Download FAQs
Is SAGA GIS really free?
Yes. SAGA GIS is free, open-source software (GPL license) with over 450 modules included. There is no paid version or locked feature.
Does SAGA GIS need installation?
Not on Windows — it is portable. Unzip the x64 folder and run saga_gui.exe. Linux users install it from their distro’s repository or the SourceForge files page.
What is SAGA GIS used for?
Terrain analysis is its strength: slope, aspect, hillshade, watersheds, and flood or erosion modeling from elevation data. It also covers geostatistics, image analysis, and general geoprocessing.
Can SAGA GIS work with QGIS?
Yes. QGIS includes SAGA algorithms in its Processing Toolbox, and both read the same GeoTIFF, shapefile, and grid formats. Many students preprocess in SAGA and map in QGIS.
Where do I get free elevation data?
SAGA 9.7.0 can auto-download CGIAR SRTM and Copernicus DSM tiles. You can also use OpenTopography or USGS EarthExplorer. One 30-meter SRTM tile is enough to learn.
Is SAGA GIS good for beginners?
For terrain analysis, yes — the module names say exactly what they do, and the defaults work well. It is less beginner-friendly than QGIS for general map-making, so use each for its strength.
Related posts: Grass GIS Download for Windows and macOS · QGIS Download for Windows, MacOS and Linux · What is PostGIS? GIS extension for PostgreSQL
You downloaded SAGA GIS 9.7.0 free, ran it with no installation, loaded a free elevation DEM, built a hillshade, computed slope, and extracted a stream network. That is terrain analysis end to end — the exact workflow behind flood-risk maps, landslide studies, and site-suitability projects. Next, try the Topographic Wetness Index for landslide mapping, or pipe your catchment grids into QGIS for final map layouts. SAGA GIS is free, powerful, and yours to master. Go map some terrain.
Disclosure: Some links on this page are affiliate links. If you buy a book through them, CartoGeek may earn a small commission at no extra cost to you. This helps keep our GIS guides free for students. Thank you for your support!
Recommended GIS Books
Learn QGIS: Techniques for Efficient Spatial Analysis (5th Edition)
by Eugenia Sarafova, Ivan Ivanov, Andrew Cutts, Anita Graser
The most current beginner-to-intermediate QGIS book, covering spatial analysis, cartography, field data collection and earth observation workflows with real-world examples. Written with input from Anita Graser, a well-known QGIS community figure, it walks readers from first install to confident analysis.
Pros:
- Up to date with recent QGIS versions
- Hands-on, exercise-driven teaching style
- Covers modern topics like GenAI tools and mobile data collection
Cons:
- Moves fast for absolute beginners with zero GIS background
- Some advanced chapters assume basic statistics knowledge